How I got Started on Oracle Java Cloud
Thought to type up how I got NetBeans deploying to Java Cloud today.
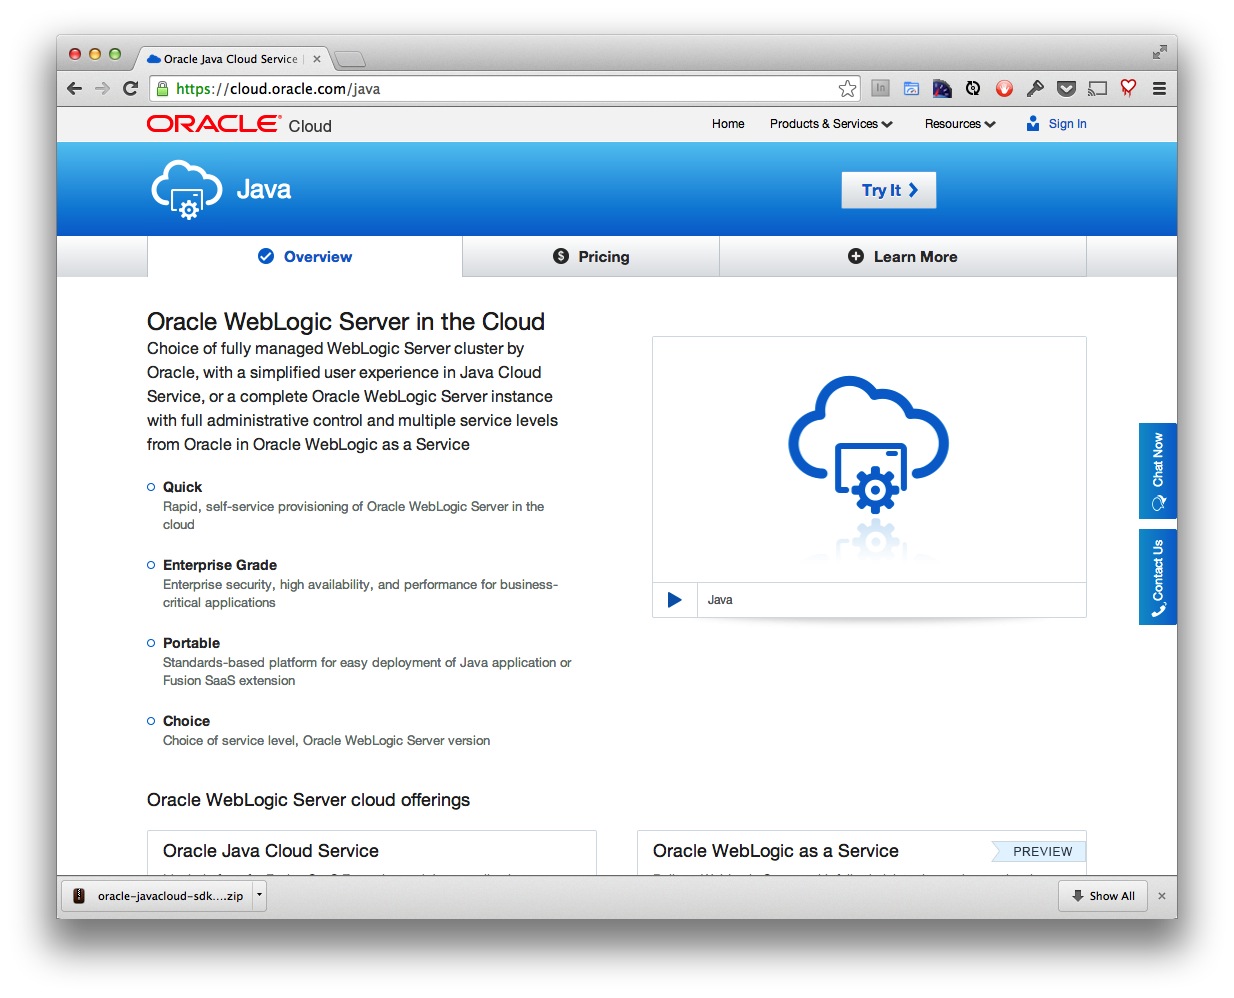
There are some good videos buried under the Resources menu at cloud.oracle.com, along with a few other good resources in there. I’m kicking myself, because I didn’t stumble onto these resources until I saw them on the demo app that gets deployed by default when your Java Cloud gets provisioned. This despite the well-labeled Resources menu at the top of the Cloud home page that literally pointed at these resources.
Resources. Who knew?
Scroll down past the customer stories videos and you’ll find some short vignettes such as:
Getting Started with the Oracle Java Cloud Service
Using the NetBeans IDE for Developing Oracle Java Cloud Service Applications
Deploy an application to an Oracle Java Cloud Service
Those three videos were 22 minutes well spent.
Meanwhile, here are the steps I followed to get up and running with NetBeans and Java Cloud:
Get a Java Cloud trial
You need to get provisioned, and this will take a little while as it’s a two-stage process. First, you sign up for a trial Java instance at cloud.oracle.com/tryit. Fill out the forms and request the service.
Now wait. For a while. You’ll eventually get an email from Oracle Cloud Admin asking you to activate your Trial. Don’t dilly-dally: you need to activate the trial before you can access the cloud and the activation button is only active for a few days. Click the Activate My Trial button in your email to do the actual provisioning.
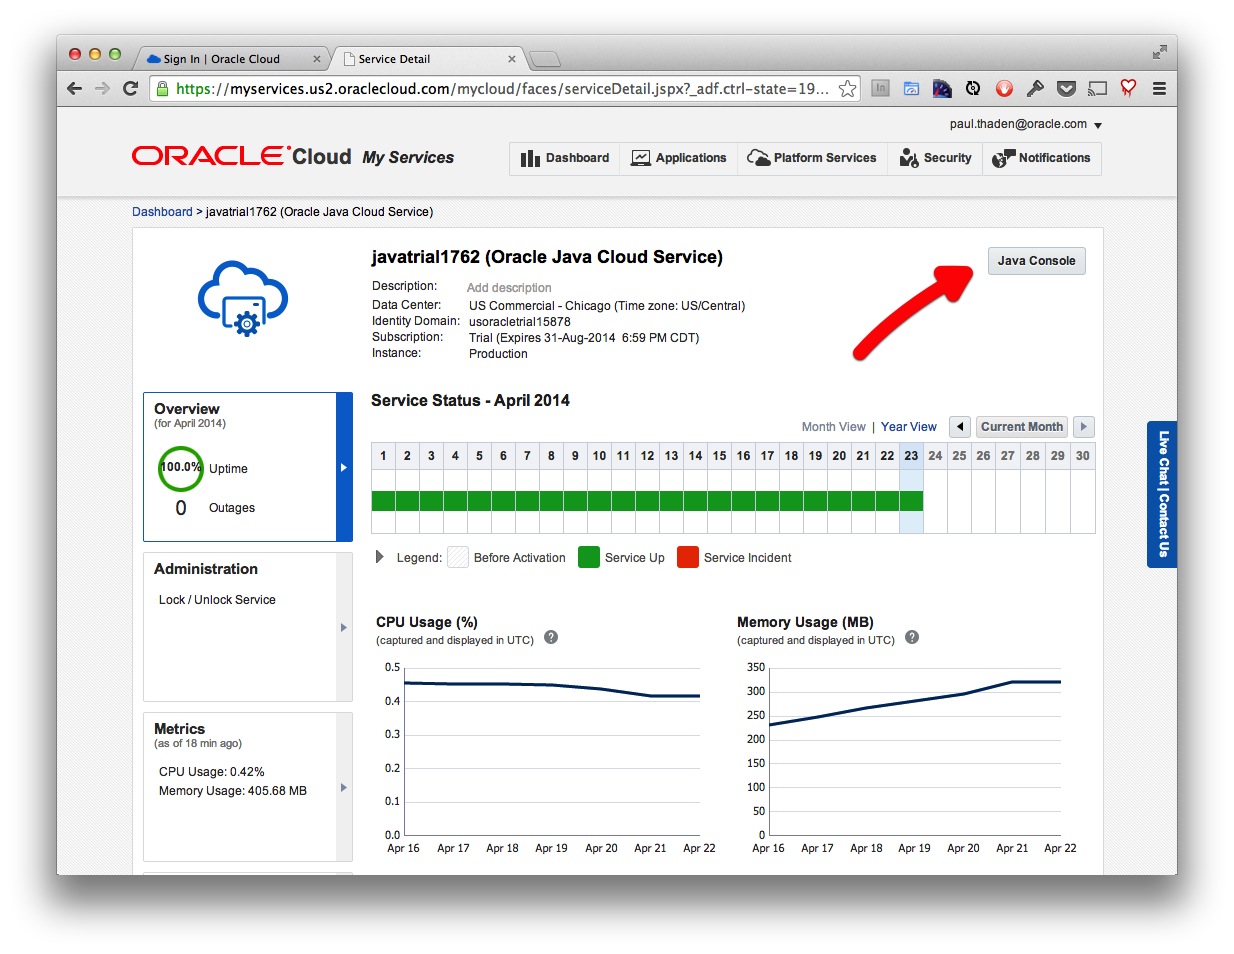
Now wait again. For not nearly as long. You’ll get another email from Oracle Cloud Admin, but this time with details on accessing your newly-spun up instance. There are a lot of vital links and details in the email: your temporary password for the new instance, a link to your account dashboard (which is pretty much the same place) but with the all-important Identity Domain identifier listed, and direct links to the Java console URL and the Database ApEx instance that comes with your trial. Take note of your Data Center listed in this section, just in case it comes in handy later.
These direct links are useful, but I personally got messed up later on when I went to sign in directly at cloud.oracle.com/sign_in and tried to map up to this four-quadrant login screen:
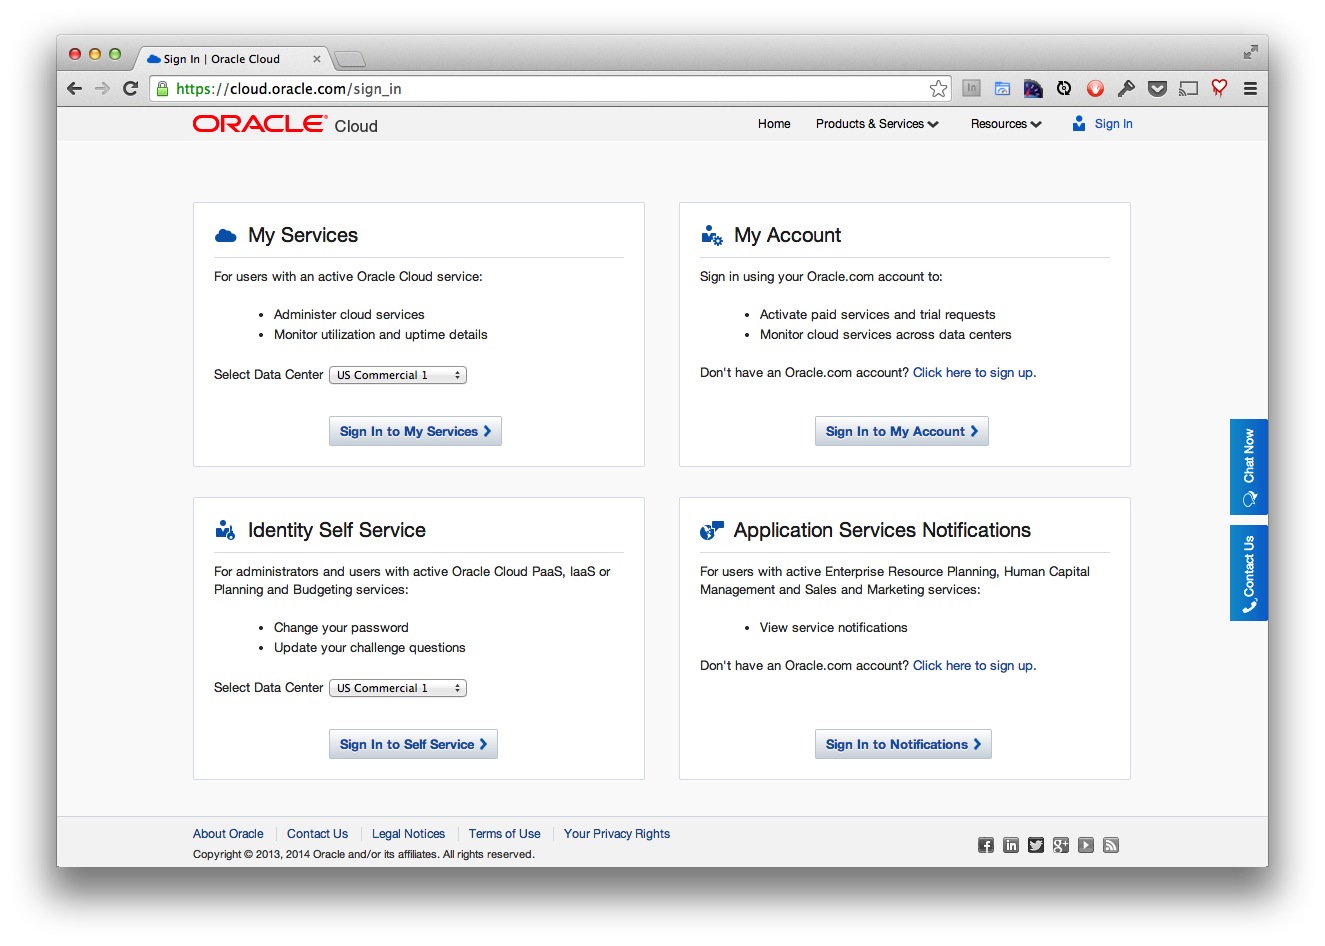
My Account in the top right takes your Oracle SSO sign in and gives you the dashboard of services you’re subscribed to. This one was easy.
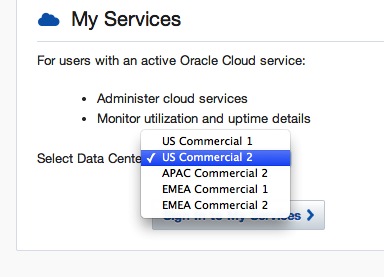
My Services in the top left will sign you into your services, but you need to make sure you’ve picked the right Data Center in the drop down. I got hung up on this: my trial is on the US Commercial 2 data center, but the page defaults to a different data center. The login page that shows after you click Sign In to My Services will challenge you for your username, password and identity domain but it doesn’t draw attention to the fact that you might be signing into the wrong datacenter. The only hint I had was that my password and identity domain wouldn’t get me in, and the forgot password link and challenge questions wouldn’t work either. This was all because I had picked the wrong data center instead of clicking the direct links in my provisioning email.
Identity Self Service is where you can change your identity domain password and set up those challenge questions. Again, make sure you’ve selected the right datacenter or you won’t be able to sign into your identity domain.
Have a look at the Java console
In your provisioning email, you should have a deep link to your Java Trial Service URL. You can also get to this console URL from your My Services pages by drilling into the Overview page for your Java trial and then clicking the Java Console button:
In the Java console you’ll have a sample app already deployed and running, named welcome-app. You can click the Test Application button to get the URL for this sample app and have a look at the resources that sample page links off to.
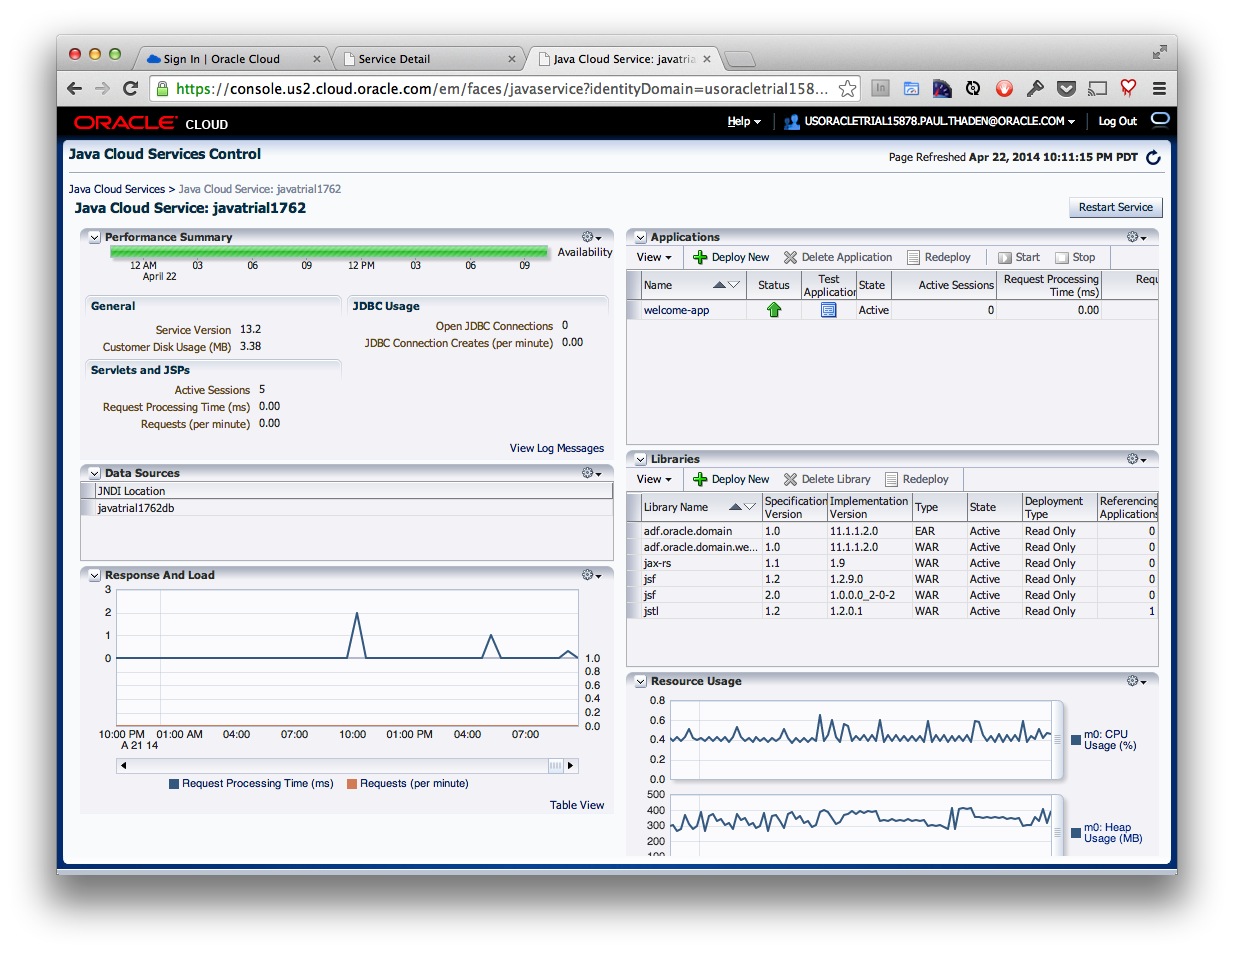
You can also use this console UI to deploy an app’s WAR or EAR file by hand, assuming your code passes all the Java Cloud whitelist tests. But we’re going to set up the IDE to deploy directly.
Downloading the SDK and configuring NetBeans
There are Oracle Cloud plugins for NetBeans, JDeveloper and Eclipse to enable deploying directly to the cloud. I’ll walk through the steps that worked for me in NetBeans 8.0 for Mac.
First, install the plugin into NetBeans via Tools >> Plugins >> Available Plugins. Select the Oracle Cloud plugin in the Java EE category and click Install.
Next, you need the Oracle Cloud SDK installed on your harddrive. You can get to it from the links at cloud.oracle.com >> Downloads or from this direct link. I chose the oracle-javacloud-sdk-14100.zip SDK because my Java Cloud service is running version 14.1.0.0.0 (you can find this stat in the Additional Information section at the bottom of your Java trial My Services Overview page). Unzip this SDK into a folder on your harddrive and have it ready for the next step.
Return to NetBeans and click on the Services tab (or pull down Window >> Services). There should be an icon for Cloud. Right-click it and choose Add Cloud...
Choose Oracle Cloud and click Next.
Fill in the details to match your provisioning email. The Java and Database Service names are probably pre-filled, but not with the unique service names in your trial details, so be sure to update these fields. You are the service administrator, so use your login name and password. Finally, navigate to the folder that contains the unzipped SDK you downloaded in the last step.
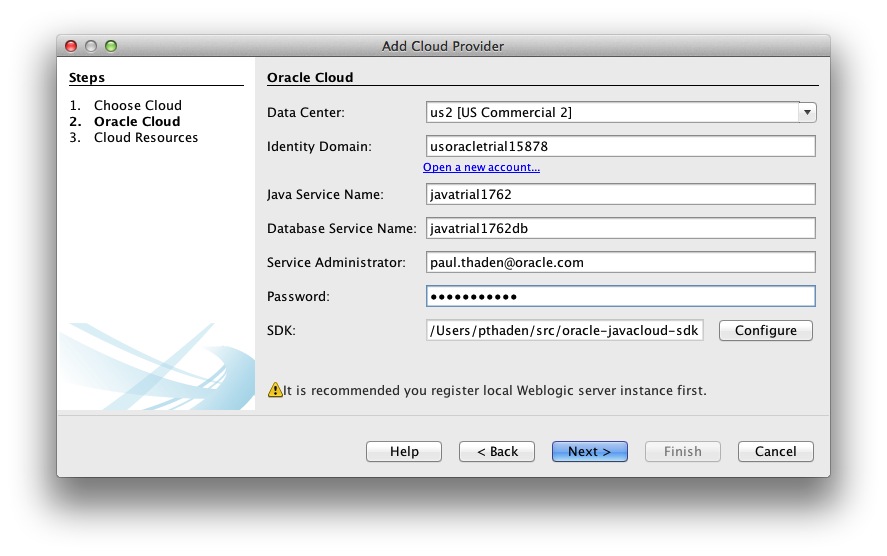
I don’t have Weblogic installed on my Mac yet, so I ignored the warning about registering a local server instance first and clicked Next and then Finish.
Create a web app and deploy
Last steps are to create a web app and deploy it to the Cloud.
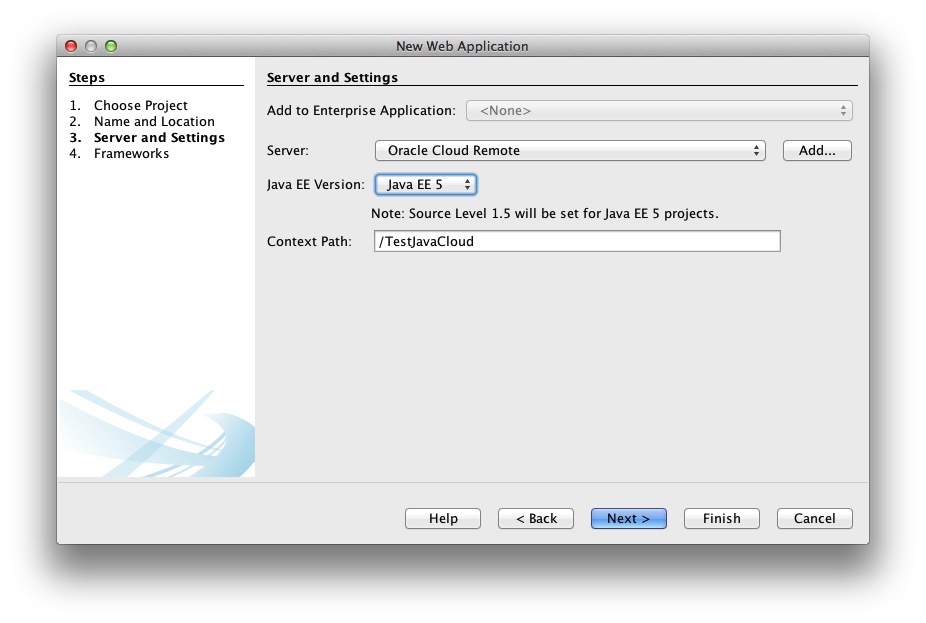
In NetBeans, choose File >> New Project..., then pick from the Java Web category a Web Application project. Click Next.

Name the project TestJavaCloud and click Next.
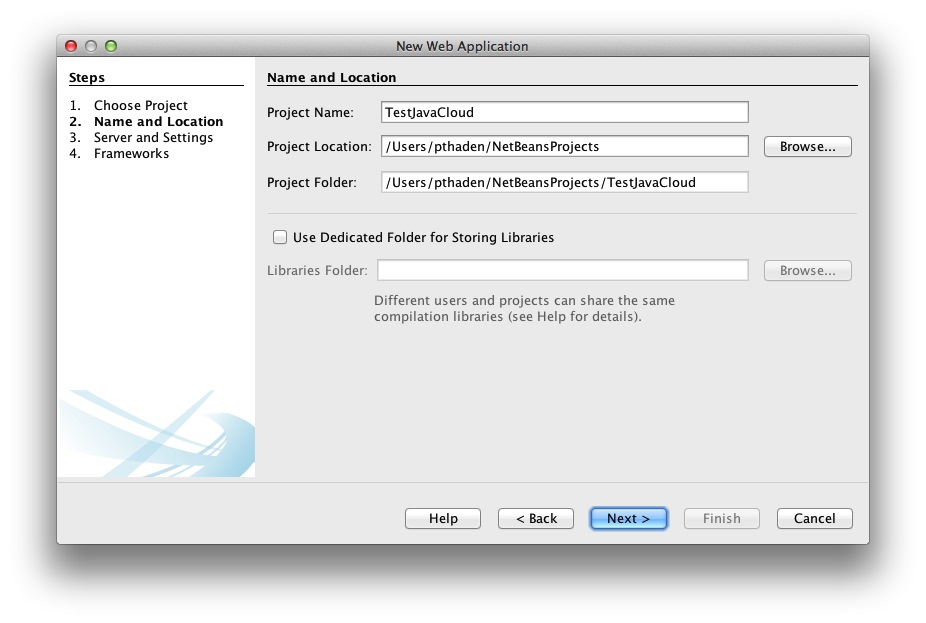
Choose Oracle Cloud Remote for your server and click Finish.
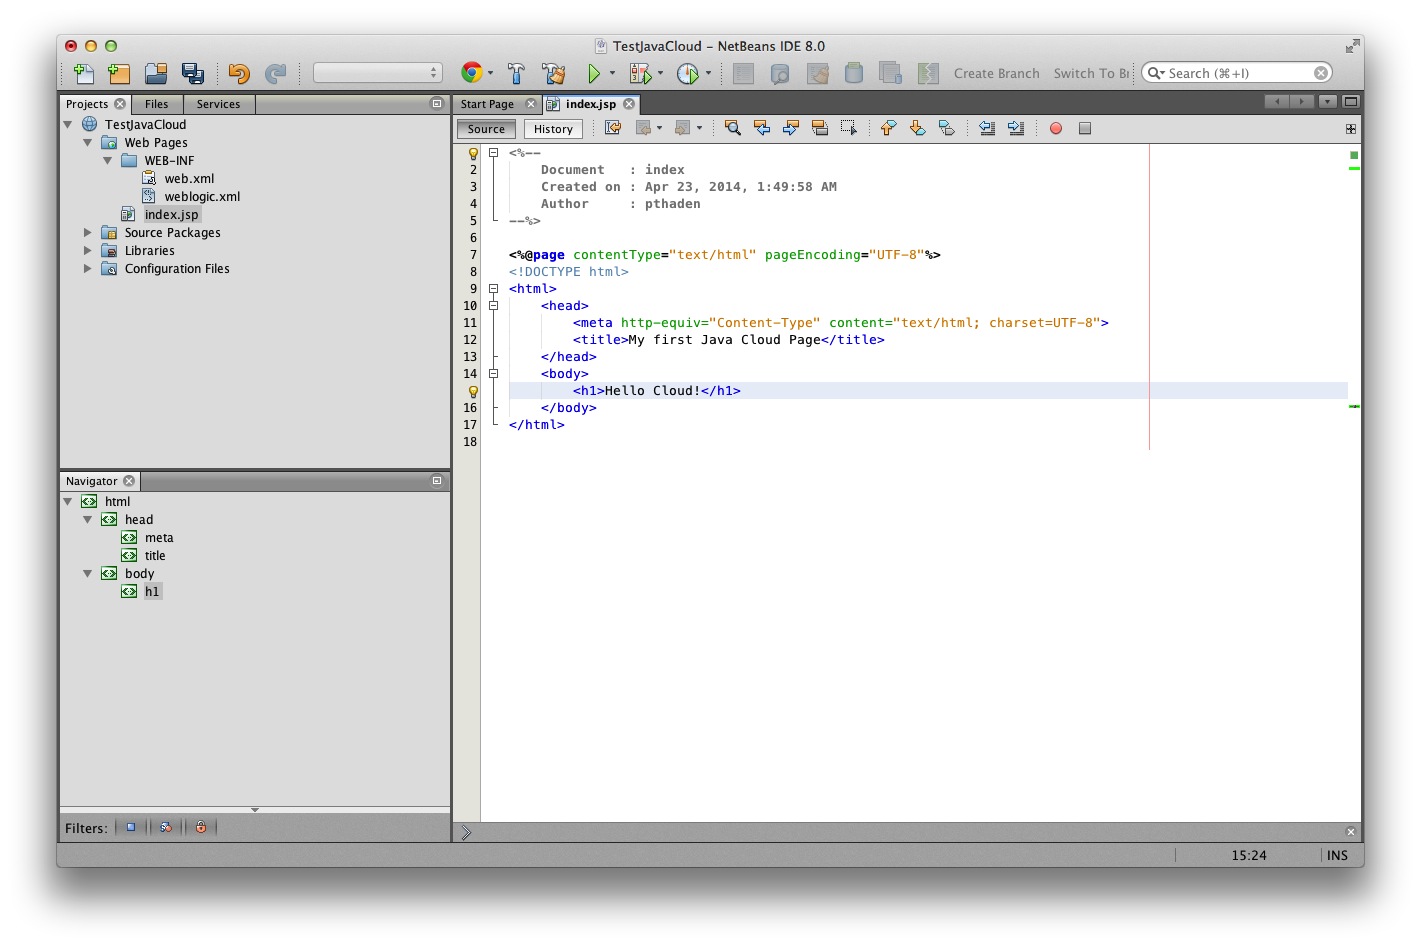
This is a simple JSP app that doesn’t do much. You can navigate in the project to Web Pages >> index.jsp and double-click to modify the Hello World code.
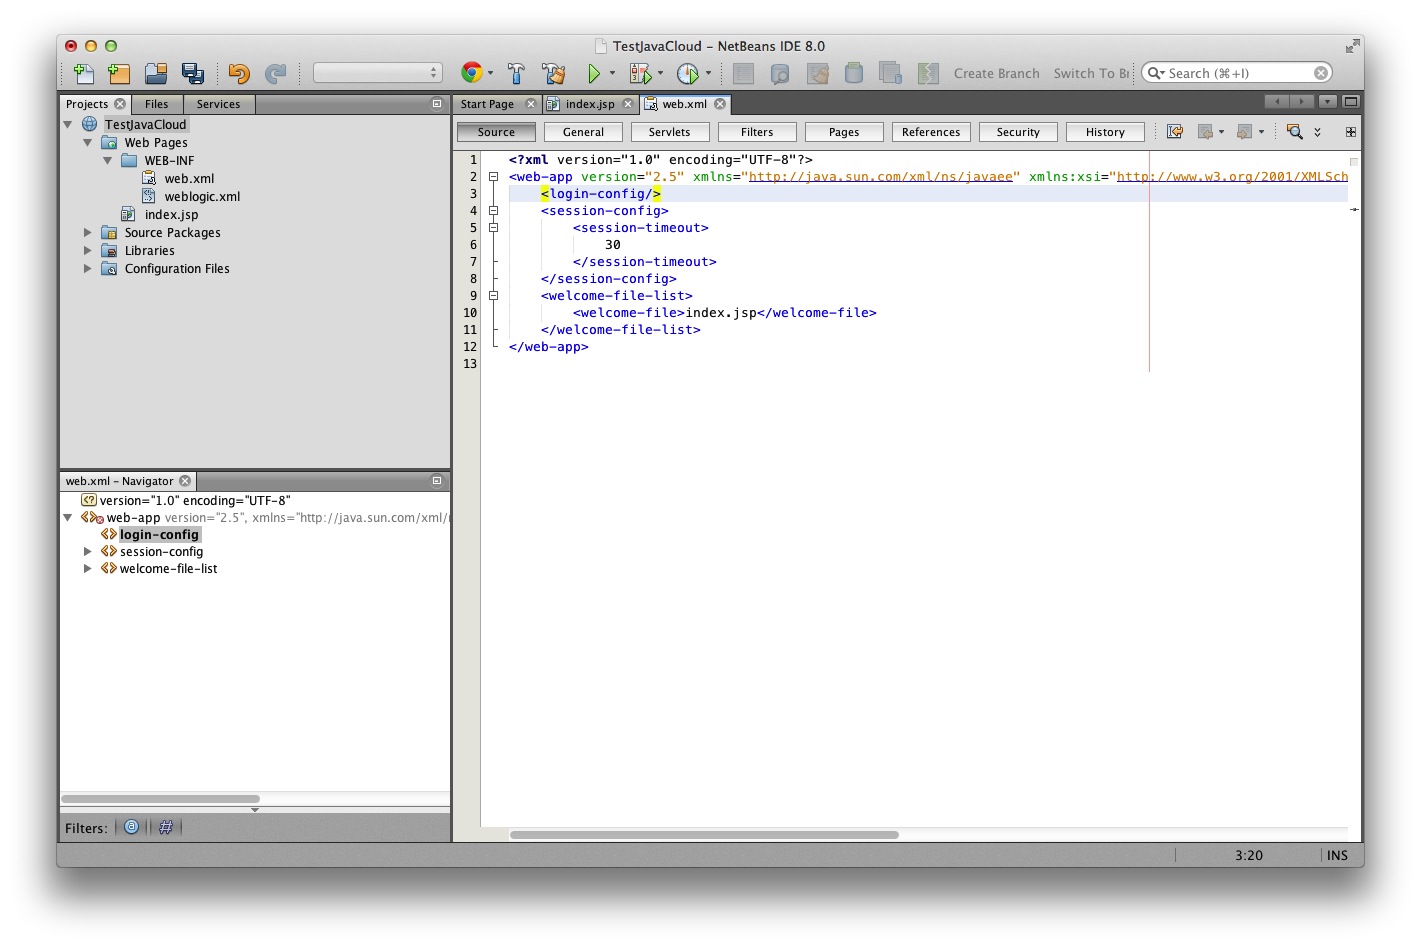
Also, before we deploy we need to make one change to the security settings in the WEB-INF/web.xml file in order to allow anyone to access the URL without being challenged for signin details for your identity domain. Add a empty <login-config/> tag to this file. (see MOS article 1531715.1 for more details).
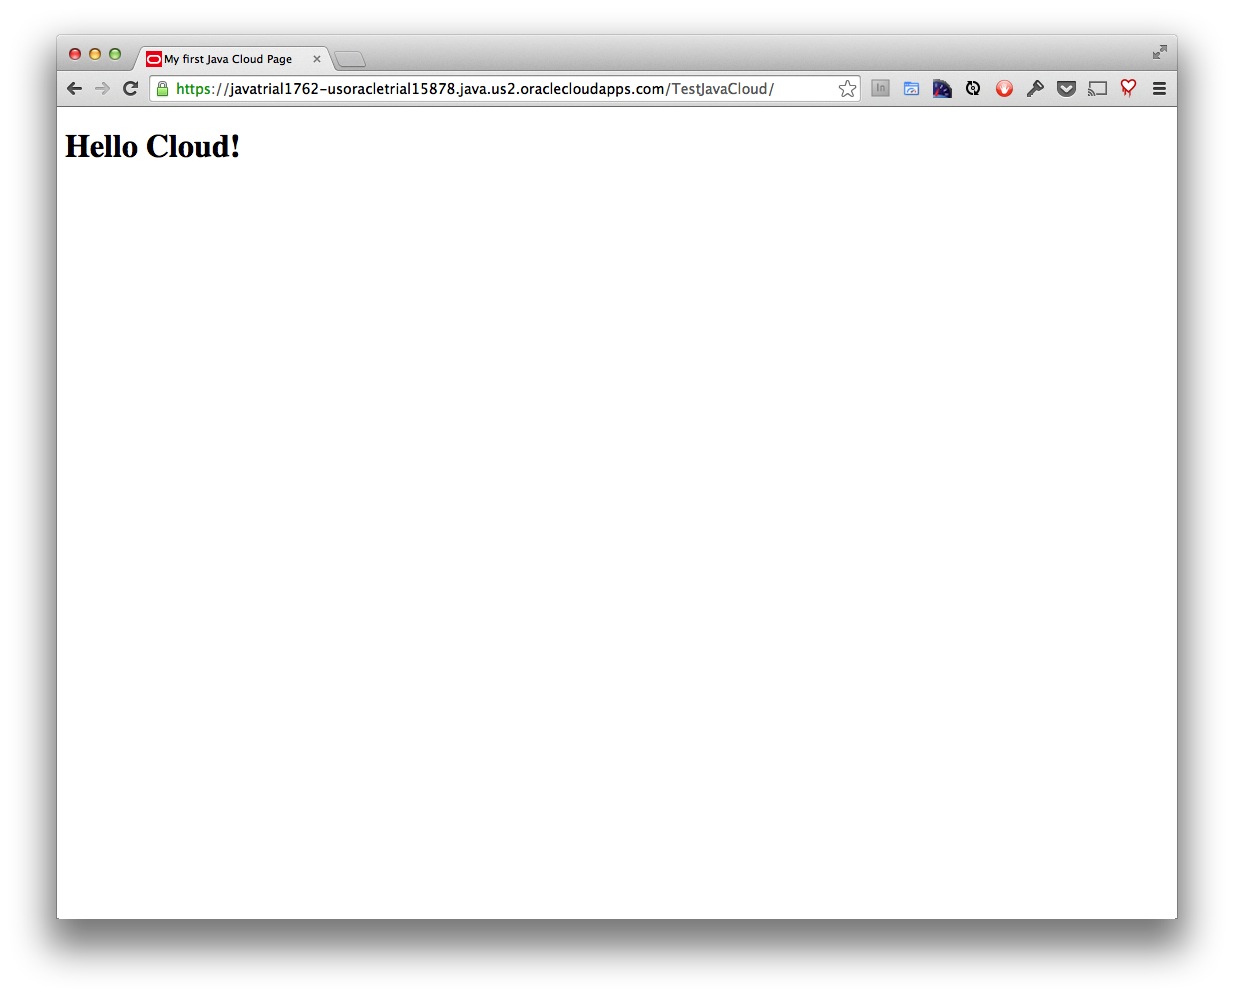
Now to deploy: Right click on your TestJavaCloud project and choose Run. This will take a few minutes as it builds the app locally and then deploys it to the Cloud. You can view the activity via Window >> Output if it’s not already showing. Eventually your default browser should launch a URL something like https://javatrial1762-usoracletrial15878.java.us2.oraclecloudapps.com/TestJavaCloud and you’ll see your beautiful creation:
Congratulations!